Hashlists
Hashtopolis uses hashlists to store password hashes you want to crack. These lists can be in plain text, HCCAPX, or binary format. Some hashes might include additional information like salts, depending on the format.
This section explains how to create a hashlist using the Hashtopolis web interface.
For a full list of supported hash types and expected formats, refer to the Hashcat documentation. You can also use example hashes from Hashcat website to test your setup by creating your first hashlist.
Create a hashlist
In the Hashtopolis web interface, go to Hashlists, then click on the button + New Hashlist. The following window will appear:

Fill out the fields as follows: 1. Name: Enter a descriptive name for your hashlist. 2. Hash Type: Choose the correct hash type from the dropdown menu. Suggestions will appear as you type in the menu, or just scroll to select the desired one. 3. Hashlist Format: Choose the format for your hashlist: - Text File: Paste or upload plain text with one hash per line. - HCCAPX/PMKID: Upload a HCCAPX file containing password hashes. - Binary File: Upload a binary-formatted hash file (e.g. a legacy Veracrypt extracted with dd). 4. Salted Hashes: Tick the box related to salted hashes if appropriate and provide the correct separator for your hashlist. The flag is enabled/disabled according to the settings defined in the Hashtype section. If the provided salt(s) is in hex, the following flag needs to be enabled otherwise the salt will be interpreted as a UTF8 value. 5. Hash source: Select one of the following hash source types. 6. Providing the hash: The last field of the form will automatically adapt depending on the chosen source type. You’ll be asked to provide additional details: - Paste: Copy and paste the hashes directly into the "Input" field. - Upload: Select a file containing the hashes from your computer. - URL Download: Provide a URL to download the hashlist. - Import: This option can be used as a workaround in case of upload errors with the first version of the user interface. To import a file, first copy it to the import folder as described in the section Import a new file. 7. Access Group: Modify the access group associated with the hashlist if needed. 8. Create Hashlist: Click "Create Hashlist" to finalize the process. This will open a new page displaying the details of your newly created hashlist.
Hashlists View
Ordered by ID by default. It reports the hashlists created. A checkmark is shown beside the hashlist name once all associated passwords have been successfully recovered. It shows the number of recovered passwords as well as the total number of hashes. It allows to import pre-cracked hashes or export the recovered passwords (see below for more details). The hashlists can also be archived or deleted.
Hashlists Details
If you click on a Hashlist, either in the hashlists view, in the Tasks overview or inside a task, it brings you to the corresponding Hashlist details page.
Apart from the parameters specific to this hashlist (i.e. ID, Access Group, Hashlist name, ...), the page displays some information about the total number of hashes, the number of cracked ones and the number of remaining ones to be recovered. Clicking on one of these three values will open a new window displaying information about the Hashes of the Hashlist as detailed below.
Hashes of Hashlist X
This page list all the hashes from the related hashlist. Filters can be applied to show either the cracked, the uncracked or all the hashes. According to the display filter selected, the Hashes only, the plaintext only or both are displayed. Additionally, the cracking position (to be defined) can be displayed next to the cracked ones. Only 1000 hashes can be displayed at a time within a page but the user can navigate through the pages. The number of hashes per page can be configured in Config > UI settings.
A HEX converter is present at the bottom of the page to convert any HEX values. This can be useful when the reported password is stored in a HEX format.
Actions on the hashlist
Several actions are offered to the user which are detailed below. Note that some of the options are logically not available if no password have been recovered for the specific hashlist.
-
Download Report: will we still have this function
-
Generate Wordlist: This action generates a file listing all the recovered passwords from this hashlist. The file is automatically stored in the wordlist section of the Files section. The generated file can be easily retrieved as it got assigned to the latest file ID. The filename is Wordlist_[Hashlist_ID][dd.mm.yyyy][hh.mm.ss].txt.
-
Export Hashes for pre-crack: This action generates a file listing all the recovered passwords from this hashlist associated with the corresponding hash value in the format [hash]:[plaintext]. The file is automatically stored in the wordlist section of the Files section. The generated file can be easily retrieved as it got assigned to the latest file ID. The filename is Pre-cracked_[Hashlist_ID][dd-mm-yyyy][hh-mm-ss].txt.
-
Export Left Hashes: This action generates a file listing all the hashes for which no password have been recovered at the moment of the file creation. The file is automatically stored in the wordlist section of the Files section. The generated file can be easily retrieved as it got assigned to the latest file ID. The filename is Leftlist_[Hashlist_ID][dd-mm-yyyy][hh-mm-ss].txt.
-
Import pre-cracked Hashes: This action opens a new page in which the user can upload pre-cracked hashes for the related hashlist. A pre-crack is supposed to be a hash contained in the hashlist associated with a plaintext in the format [hash](:[salt]):[plaintext]. Such data can be imported in different ways: "Paste, Upload, Import, URL download" such as the option to import the hashes during a hashlist creation. In case of salted password, the field separator must be indicated, ':' being the default one. When validating by pressing the Pre-crack hashes button, the back-end will check if the imported data contains hash values from the targeted hashlist and integrate the plaintext value accordingly. If the option Overwrite already cracked hashes is selected, existing recovered passwords will be overwritten by the new imported ones in case of conflict. The front-end is then reporting to the user how many hashes have been considered as well as how many entries have been updated.
Pre-cracked management is useful to share results between different instances of hashtopolis. This is especially relevant for salted hashlists as each new recovered plaintext is improving the efficiency of the attack is there is no more hashes associated with the same salt value.
Tasks overview and creation
At the bottom of the page there are three subsections related to task for this hashlist.
-
Tasks cracking this hashlists: This section lists all the tasks that are related to this hashlist. Note that supertasks will not appear here (is this something we would like in the future... let see how it will be handled within project). The details displayed are defined in the Show Tasks section as they are the same. Note that not all the infos present in the Show Tasks page are displayed here.
-
Create pre-configured tasks: this section lists all the existing pre-configured tasks. The user can select a set of pre-configured tasks and create the corresponding task for the current hashlist. See the section on pre-configured tasks for more detail on this.
-
Create Supertask: Similarly to the pre-configured tasks, this section lists all the existing supertask that the user can create for the current hashlist. See the section supertask for more details on this.
Super Hashlists
Note
Should we include pictures in this section that is quite obvious
A Super Hashlist is a virtual hashlist that combines multiple classic hashlists without duplicating data at the database level. It allows you to run a single cracking task on multiple hashlists at once. Since the hashes are only linked, not merged, storage is optimized, and updates to individual hashlists are immediately reflected. This is especially useful when working with related datasets that require the same attack strategies, saving time and resources while keeping everything well-organized.
New SuperHashlist
The page displays all the existing hashlists in the database. To create a new superhashlist, you need to do the following: - select all the hashlists you want to integrate in the superhashlist; - scroll down to the bottom of the page, and enter a name for the superhashlist in the corresponding field; - Click on the create button.
You can select all the hashlists at once by clicking on the button select all. However, keep in mind that a superhashlist should only contains hash of the same type to work. We should probably introduce a check at the creation of the super list, and also allow to search or filters to only display those of a specific type to select all in a controlled manner
Overview
Once you have created a superhashlist or if you open the SuperHashlist menu, the overview page of Superhashlist is open. Such page displays all the information about the superhashlists created so far. It is very similar to the hashlist overview page, the only difference being that you cannot archive a superhashlist.
If you click on a superhashlist, the superhashlist detail page will be open. Again this page is very similar to the hashlist page. The only difference is that it contains the following details about the hashlist(s) contained in the superhashlist: - ID of each hashlist - Name of each hashlist - Cracked percentage of each hashlist
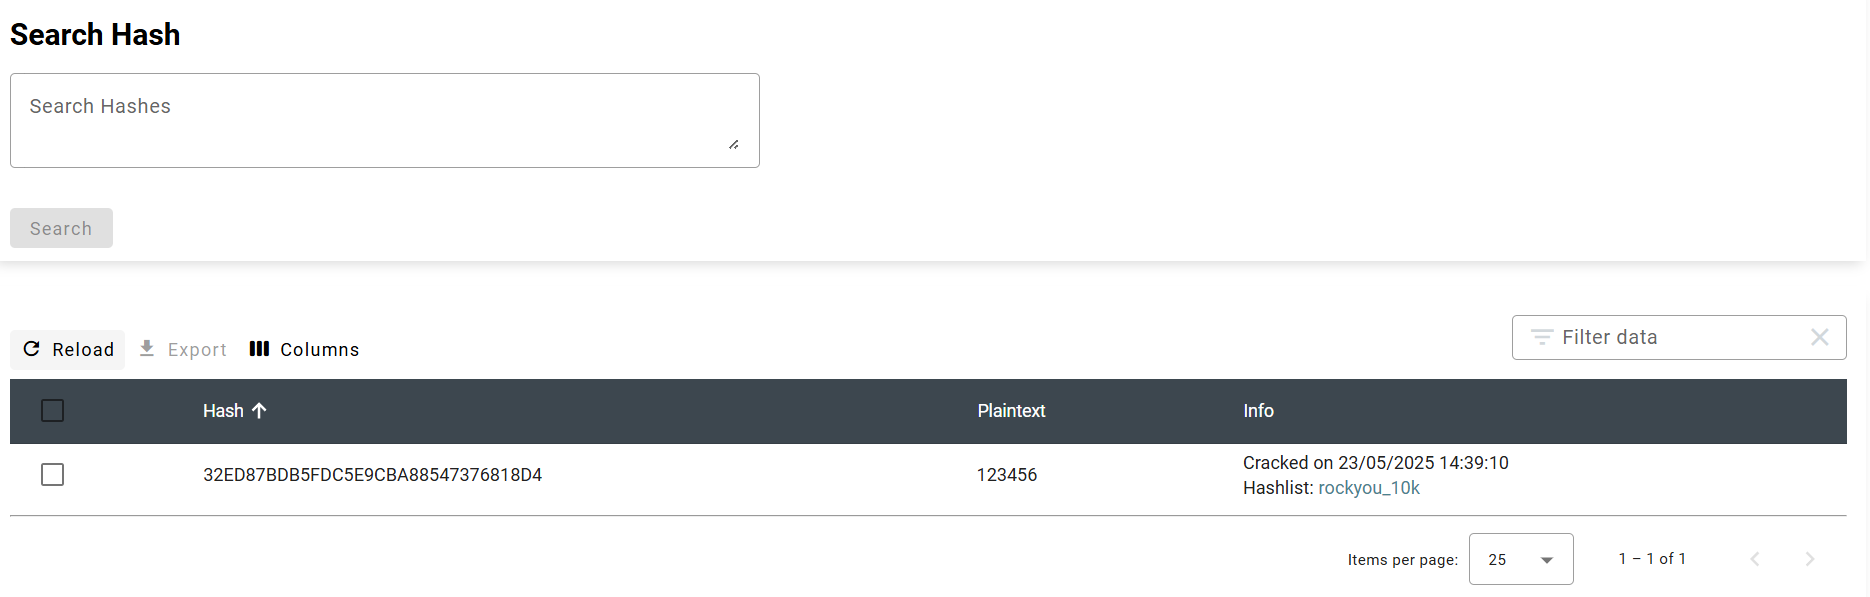
Search Hash
This page displays a free text zone in which the user can type multiple hashes, one per line, to check if they are present in the database or not. The hashes do not need to be of the same type. Furthermore, the hash does not need to be complete.
The result will display all the hashes that correspond to the given entry/ies. It will display one block for each entry specifying either: - NOT FOUND: if the hash is present in no entries; - A list of all the hashes that contains the given entry, specifying in which hashlist(s) they are contained and the cleartext password if they have been cracked already.
Show Crack
This page displays all the cracked passwords that have been recovered and that are stored in the database. It shows the following fields.
- Time Found: Indicates when the password has been recovered
- Plaintext: Password that has been recovered
- Hash: Hash for which the password was recovered
- Hashlist: ID of the hashlist that contains this hash
- Agent: ID of the agent that has recovered the password
- Task: ID of the task that has recovered the password
- Chunk: ID of the chunk that has recovered the password
- Type: Hashmode related to the hash
- Salt: Salt associated to the hash if relevant.
1.000 entries are displayed per page and there is a search functionalities that is applied on all the field of the table.