Files: Rules, Wordlist and other
When creating a password recovery task in Hashtopolis, you may need to upload additional files to the server, depending on the type of attack you want to perform. These files fall into three main categories:
-
Rules Rules files contain sets of instructions for dynamically modifying entries in a wordlist during an attack. By applying rules, you can generate variations of passwords without the need for additional wordlist files. For example, rules can:
- Append numbers or special characters.
- Replace or capitalize specific characters.
- Reverse words or combine entries.
Rules are commonly used alongside wordlist attacks to increase the range of password candidates efficiently.
-
Wordlist Wordlists, also known as dictionaries, are used in dictionary attacks. Each line in a wordlist is treated as a potential password candidate. Examples include: collections of commonly used passwords, specialized dictionaries tailored to a specific target or context.
-
Others: This category includes any additional files required for specific attack types or configurations. Examples include charset files or any files needed by preprocessors. These files vary depending on the nature of the task and the tools being used.
Manage Files
Each type of file has a dedicated page containing similar information. The figure below shows what the rule page looks like. It contains information such as the name of the file, its size, the number of line in it as well as the access group. The key next to the name indicates that the file is secret and can only be accessed by trusted agents.

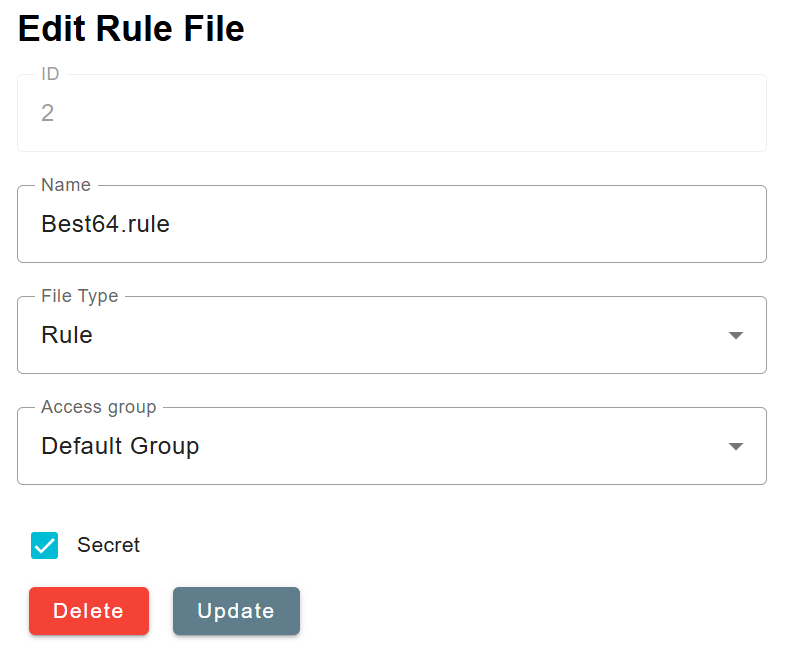
From this page, files can be edited by clicking on their name or on the related action. Files can also be deleted from there. The picture below shows the page opened when editing a rule file. Other type of files are very similar to this one.
Navigating to the Files page of the Hashtopolis User Interface, you can manage the files uploaded to the server.
- Select Category.
- Secret: Files that are marked as secret will only be sent to trusted agents. Line count: Reprocess the file and update the line count with the number of lines contained in the file.
- Edit: Edit the parameters of the file (name, file type and associated group).
- Delete: Removes the file from Hashtopolis.
Note
Files can only be deleted if they are not referenced in any task, whether they are active, finished or even archived.
Upload New Files
For each category, new files can be added to the server by pressing "New Wordlist/Rules/File" button. Files are uploaded using one of the following methods:
- Upload from your computer – Directly upload files stored on your local machine.
- Download from a URL – Provide a URL to fetch files from an external source. Detailed instructions for each upload method are provided in the following subsections.
Upload a new file from the computer
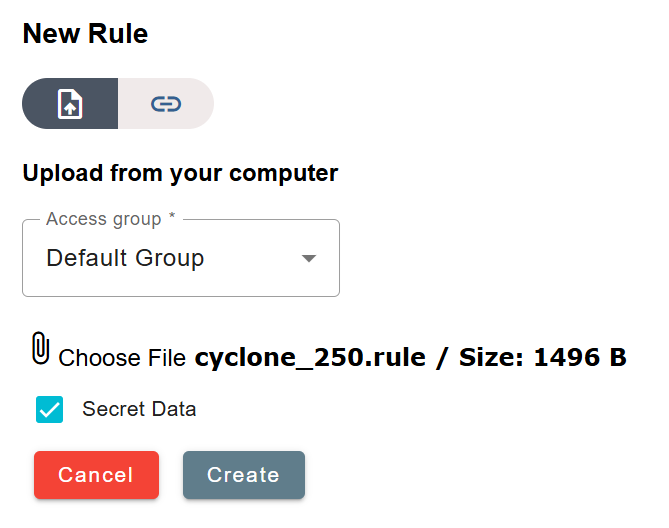
- Add file: Click this button to enable file upload. After clicking, a new field labeled Choose file will appear. Each time you click on Add File, an additional Choose file field will be added, allowing you to upload multiple files simultaneously..
- Associated Access Group: Define the access group that will have permissions to access the file(s) you are uploading.
- Choose file: Click this button to open your computer’s file explorer. Select the file you wish to upload.
- Upload files: Once you have selected all the files you wanted to upload, click the Upload files button.
Download new file from URL

- Name: Name of the file that will be downloaded
- Associated Access Group: Define the access group that will have permissions to access the file(s) you are uploading.
- URL: Provide the URL to download from..
- Download file.